Make a new document in Finale
This time, we will explain how to create a new document in Finale, the most widely used software for composing and editing sheet music.
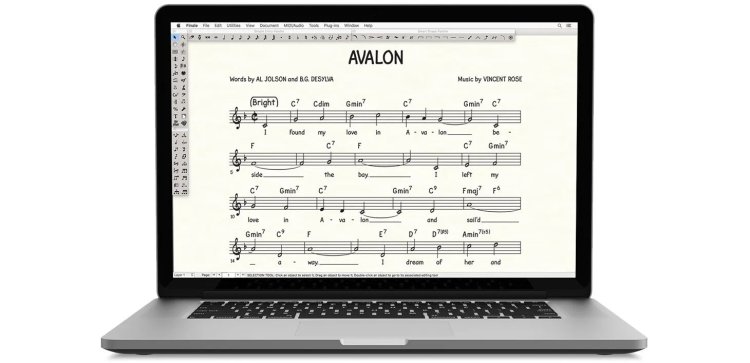
On this occasion, we are going to explain how to create a new document in Finale, which is the most popular software for creating and editing sheet music.
If you are a musician and want to start achieving a good level in all aspects of music, then you must learn to use Finale.
So, let's not wait any longer and start with a new document in Finale.
Starting Finale
To create a new document in Finale, the first thing you need to do is download the software so you can install it on your computer.
You can start the download from our guide on how to Download Finale sheet music editor, where you'll find all the steps to install it on your desktop computer or laptop.
Once you have downloaded and installed the program, it's time to start Finale.
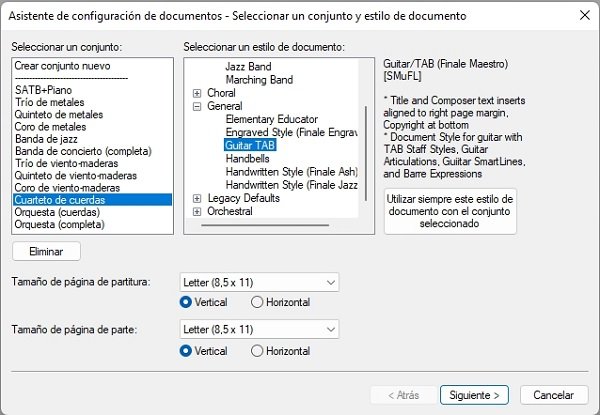
Select the Finale Setup Wizard
After launching the program, a window will open where you can create a new document in Finale.
You will have several options in "Select Ensemble" and "Select a Document Style". At this point, you won't select any ensemble, but you will select "General" and "Guitar TAB" and click "Next" to create the staff.
However, this staff may be created in the Treble Clef due to a Finale error, but you can later change it to the Bass Clef.
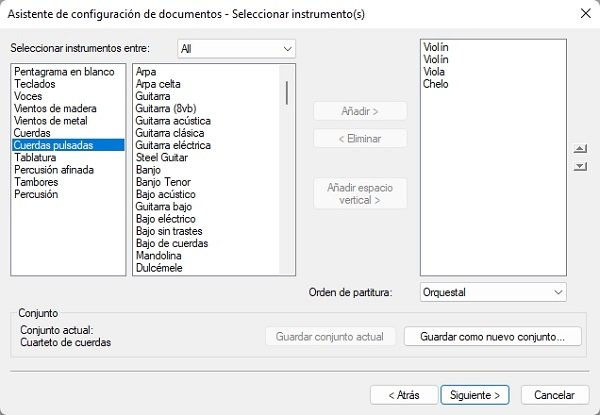
Instrument Selection
When you click "Next", you can select the instrument. Click on "Plucked Strings" to display several instrument options.
At this point, select "Electric Bass" and click the "Add" button to add the instrument, then press the "Next" button.
Document Data
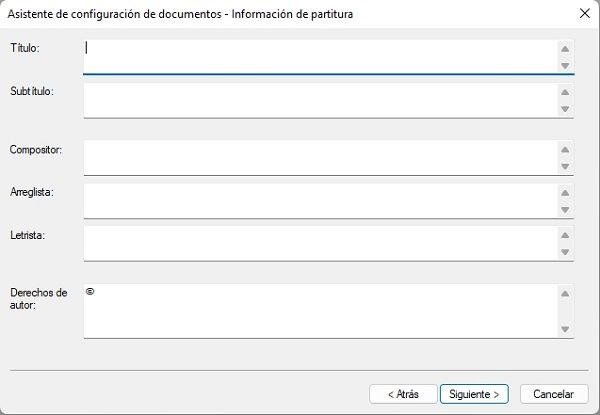
In this window to create a new document in Finale, you should fill in the score information: 1. Title, 2. Subtitle, 3. Composer's name, 4. Arranger, 5. Lyricist, and 6. Copyright.
Now click "Next" to continue with the configuration.
Time Signature and Key Signature Configuration
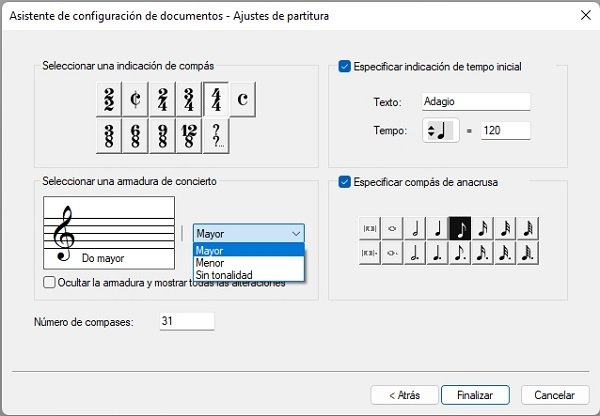
In this new window, you should select the time signature, the key (major or minor), the tempo, the bpm, and if you want a pickup measure.
At the end of the options, you can choose the number of measures you want. We recommend leaving the standard at 31, and you can later modify it to add more measures as needed.
Some Details that Finale Doesn't Fix by Itself
Like all software, Finale is not free from errors, so you may find some issues that aren't automatically fixed in the new document in Finale.
During our tests, sometimes the document is created with the Treble Clef despite selecting the bass instrument, while other times it is created with the Bass Clef.
If your document is created with the Treble Clef, you can fix this by selecting the pointer in the options bar.
With the pointer selected, click on the "Treble Clef" within the staff and right-click to see the option "Edit Clef Definition".
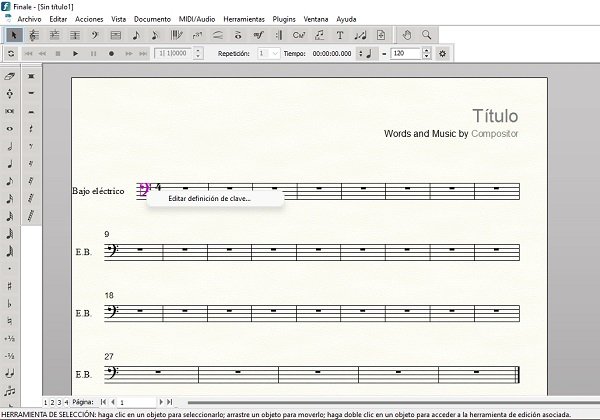
When you click on "Edit Clef Definition", a window opens providing all available clef options, among other configuration modes.
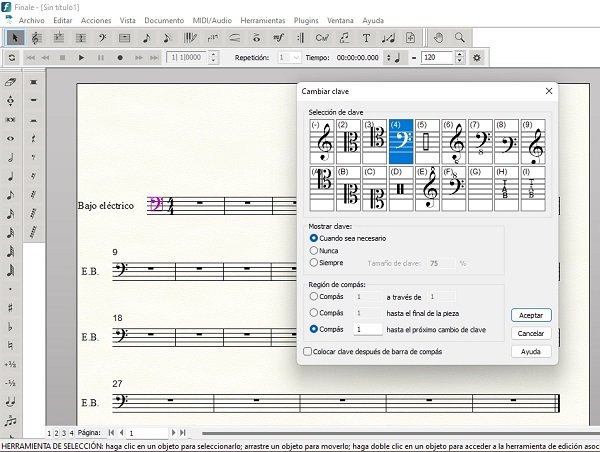
Here, you select the Bass Clef and confirm your selection.
Finale Panel
Creating a new document in Finale is not enough; you also need to familiarize yourself with the panel, which is divided into three bars.
- Top Bar: includes File, Edit, Actions, View, Document, MIDI/Audio, Tools, Plugins, Window, and Help.
- Side Bars: these are two bars containing all the musical notation options.

In upcoming posts, we will provide you with many guides so you can master this sheet music editing software.
For now, download the software from our guide and then create your first new document in Finale.
What's Your Reaction?


